COPYRIGHT, PLEASE NOTE

All the material on this website is copyrighted to J-P Metsavainio, if not otherwise stated. Any content on this website may not be reproduced without the author’s permission.

Have a visit in my portfolio

Showing posts with label animations. Show all posts

Wednesday, October 6, 2021

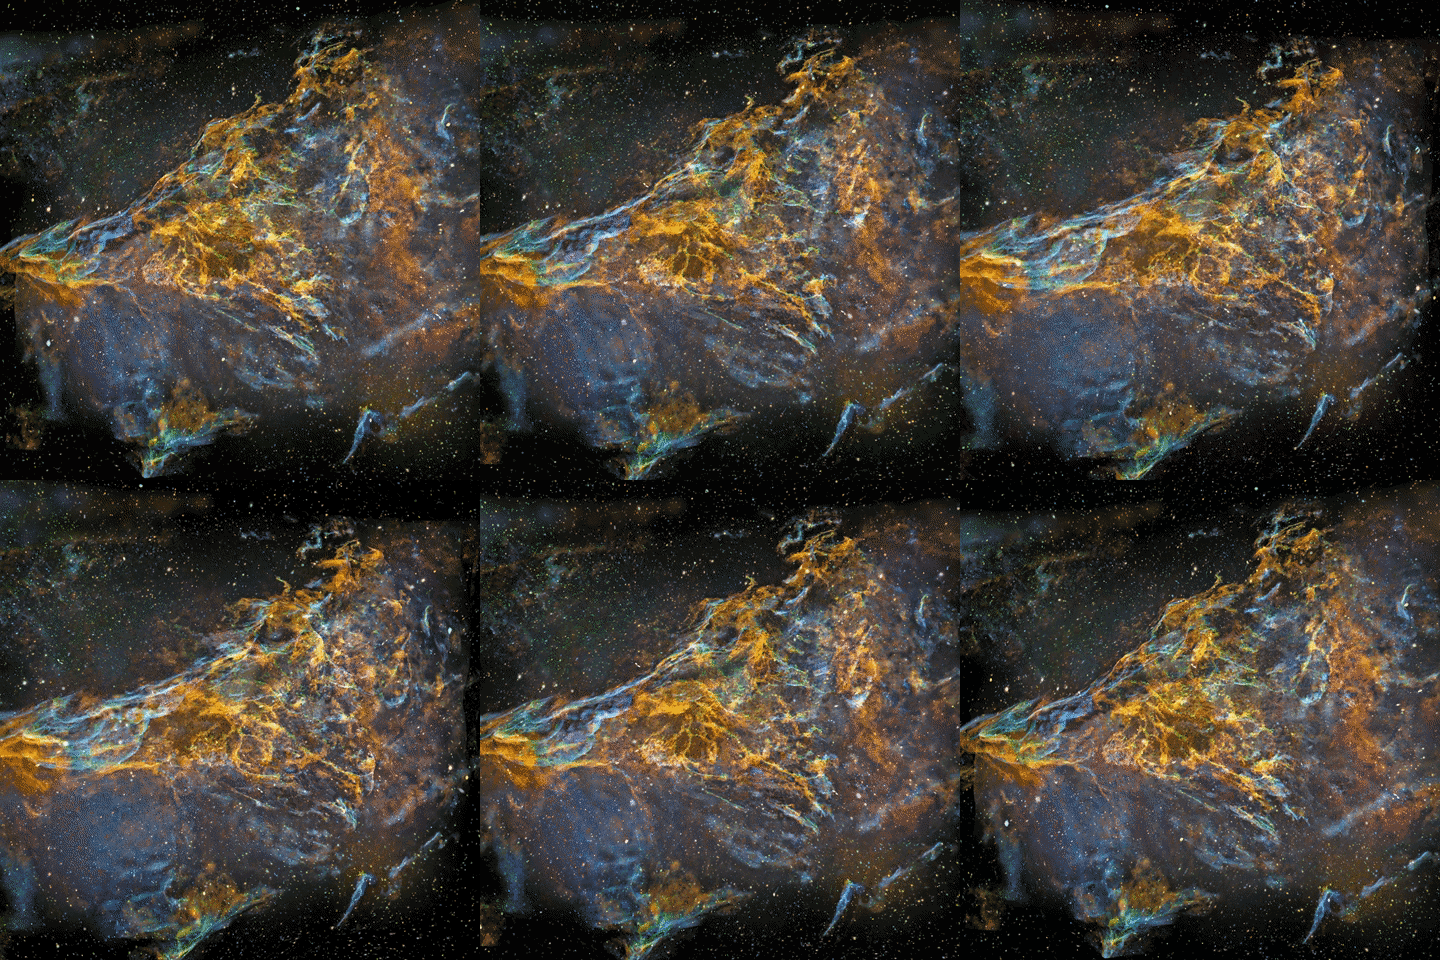
Unveiling The Veiled

The Veil nebula supernova remnant in Cygnus. Original image was shot with the Canon EF 200 mm f1.8 camera optics full open, QHY9 astro camera and Baader narrowband filters at 2013.

New data is shot with Tokina 300mm f2.8 camera optics and Celestron Edge HD 11" telescope, Apogee Alta U16 astro camera with Astrodon narrowband filters between 2016 - 2020
Total exposure time is now about 45 hours.

The Veil nebula @SuperRare auction 
Animation,
 https://superrare.com/artwork-v2/unveiling-the-veiled-volume-29145
Photo, https://superrare.com/artwork-v2/unveiling-the-veiled-29137

Veil nebula Unveiled

Click for a large image, 1250 x 1700 pixels

A very deep image of the veil nebula supernova remnant in mapped colors.
Nebula in visual colors from light emitted by an ionized elements can be seen here,
https://astroanarchy.blogspot.com/2021/09/veil-nebula-unveiled-ii.html

3D-study of Veil Nebula Photo


Every single pixel in this 3d-animation is from the original 2D-image above. The model is based on on known scientific facts, deduction and some artistic creativity. The result is an appraised simulation of reality. Astronomical photos are showing objects as paintings on a canvas, totally flat. In reality, they are three dimensional forms floating in three dimensional space. The purpose of my 3d-experiments is to show that and Give an idea, how those distant objects might look in reality.

INFO


Since all of the heavier elements are born in exploding stars, we all are children of supernovae. Veil Nebula is located in the constellation Cygnus at a distance of 1500 light-years. It spans three degrees of sky, (Moon has an angular diameter of 0,5 degrees at the sky) real diameter is around 70 light-years. I collected data for the photo between 2012-2020 and I made this 3D model in 2021,exposure time is 45 hours

How the 3D-model is made


My Moleskine notebook pages from 2008, I planned how to convert nebulae to 3D


For as long as I have captured images of celestial objects, I have always seen hem three-dimensionally in my head. The scientific information makes my inner visions much more accurate, and the 3-D technique I have developed enables me to share those beautiful visions with others.

How accurate my 3-D-visions are depending on how much information I have and how well I implement it.

The final 3-D-image is always an appraised simulation of reality based on known scientific facts, deduction, and some artistic creativity.

After I have collected all the necessary scientific information about my target, I start my 3-D conversion from stars. Usually there is a recognizable star cluster which is responsible for ionizing the nebula. We don’t need to know its absolute location since we know its relative location. Stars ionizing the nebula have to be very close to the nebula structure itself. I usually divide up the rest of the stars by their apparent brightness, which can then be used as an indicator of their distances, brighter being closer. If true star distances are available, I use them, but most of the time my rule of thumb is sufficient. By using a scientific estimate of the distance of the Milky Way object, I can locate the correct number of stars in front of it and behind it.

Emission nebulae are not lit up directly by starlight; they are usually way too large for that. Rather, stellar radiation ionizes elements within the gas cloud and the nebula itself is glowing light, the principle is very much the same as in fluorescent tubes. The thickness of the nebula can be estimated from its brightness, since the whole volume of gas is glowing, brighter means thicker.

By this means, forms of the nebula can be turned to a real 3-D shape. Nebulae are also more or less transparent, so we can see both sides of it at the same time, and this makes model-making a little easier since not much is hidden.

The local stellar wind, from the star cluster inside the nebula, shapes the nebula by blowing away the gas around the star cluster. The stellar wind usually forms a kind of cavity in the nebulosity. The same stellar wind also initiates the further collapse of the gas cloud and the birth of the second generation of stars in the nebula. The collapsing gas can resist the stellar wind and produces pillar like formations which must point to a cluster.

Ionized oxygen (O-III) glows with a bluish light, and since oxygen needs a lot of energy to ionize it, this can only be achieved relatively close to the star cluster in the nebula. I use this information to position the O-III area (the bluish glow) at the correct distance relative to the heart of the nebula.

Many other small indicators can be found by carefully studying the image itself. For example, if there is a dark nebula in the image, it must be located in front of the emission one, otherwise we couldn’t see it at all.

Using the known data in this way I build a kind of skeleton model of the nebula. Then the artistic part is mixed with the scientific and logical elements, and after that the rest is very much like creating a sculpture on a cosmic scale

3D-model without textures


Monday, October 4, 2021

Three 3D-conversions out of my astronomical photos

 I have made dozens of 3D-conversions out of my astronomical photos. As an artist I like to find a new views to the reality. My models are not just a guesswork, the conversion is based on real scientific data.
At the end of this blog post there is a short explanation, how I do my conversion work.


Veil nebula in O-III light alone

Original astronomical photo about part of the Veil nebula SNR in O-III light only.

3D-study of Veil Nebula Photo


NGC1499 the California Nebula

My photo of California Nebyla in mapped colors


3D-study of California Nebula Photo


Bubble Nebula

My photo of Bubble Nebula in mapped colors


3D-study of Bubble Nebula Photo


How 3D-models are made

My Moleskine notebook pages from 2008, I planned how to convert nebulae to 3D


For as long as I have captured images of celestial objects, I have always seen hem three-dimensionally in my head. The scientific information makes my inner visions much more accurate, and the 3-D technique I have developed enables me to share those beautiful visions with others.

How accurate my 3-D-visions are depending on how much information I have and how well I implement it.

The final 3-D-image is always an appraised simulation of reality based on known scientific facts, deduction, and some artistic creativity.

After I have collected all the necessary scientific information about my target, I start my 3-D conversion from stars. Usually there is a recognizable star cluster which is responsible for ionizing the nebula. We don’t need to know its absolute location since we know its relative location. Stars ionizing the nebula have to be very close to the nebula structure itself. I usually divide up the rest of the stars by their apparent brightness, which can then be used as an indicator of their distances, brighter being closer. If true star distances are available, I use them, but most of the time my rule of thumb is sufficient. By using a scientific estimate of the distance of the Milky Way object, I can locate the correct number of stars in front of it and behind it.

Emission nebulae are not lit up directly by starlight; they are usually way too large for that. Rather, stellar radiation ionizes elements within the gas cloud and the nebula itself is glowing light, the principle is very much the same as in fluorescent tubes. The thickness of the nebula can be estimated from its brightness, since the whole volume of gas is glowing, brighter means thicker.

By this means, forms of the nebula can be turned to a real 3-D shape. Nebulae are also more or less transparent, so we can see both sides of it at the same time, and this makes model-making a little easier since not much is hidden.

The local stellar wind, from the star cluster inside the nebula, shapes the nebula by blowing away the gas around the star cluster. The stellar wind usually forms a kind of cavity in the nebulosity. The same stellar wind also initiates the further collapse of the gas cloud and the birth of the second generation of stars in the nebula. The collapsing gas can resist the stellar wind and produces pillar like formations which must point to a cluster.

Ionized oxygen (O-III) glows with a bluish light, and since oxygen needs a lot of energy to ionize it, this can only be achieved relatively close to the star cluster in the nebula. I use this information to position the O-III area (the bluish glow) at the correct distance relative to the heart of the nebula.

Many other small indicators can be found by carefully studying the image itself. For example, if there is a dark nebula in the image, it must be located in front of the emission one, otherwise we couldn’t see it at all.

Using the known data in this way I build a kind of skeleton model of the nebula. Then the artistic part is mixed with the scientific and logical elements, and after that the rest is very much like creating a sculpture on a cosmic scale

3D-model without textures

Thursday, September 16, 2021

Viral Nebula Rocks

IC1396 converted to 3D animation, very first of its kind
NOW on SuperRare

I turned my photo of IC1396 to a 3d-model at 2012 to show that it’s actually a three-dimensional volume floating in three-dimensional space. This artwork is not just a guess work, it’s based on scientific data about the structure of emission nebulae and real distance information. 

This animation went viral and it was published by several news media and major websites globally at 2012, links after the photos


Location, Constellation Cepheus at distance of about 3000 light years
IC 1396 spans about three degrees of sky (Full Moon has diameter of 0,5 degrees)
I took the photo and made the model at 2012, exposure time 15 hours. 
Time used for the collecting scientific data, 3D-model and animation way too much.


Original photo used for the animation
My original photo of emission nebula IC1396


Rotating Nebula in media

SLATE by Phill Plait 
Best Astronomy Images of 2012: 

DISCOVER MAGAZINE,
Jaw-dropping rotating 3D nebula


SMITHSONIAN MAGAZINE by Colin Schultz
Amazing Astrophotography Lets You See Nebulae in 3D

WIRED by Nadia Drake,
New Dimension: Nebulas Are Even More Amazing in 3-D
https://www.wired.com/2013/02/nebulas-in-3-d/

HUFFINGTON POST by Ryan Grenoble,
Nebula IC 1396, Animated In 3D By Finnish Astrophotographer J-P Metsavainio, Is Astounding

PETAPIXEL, Michael Zhang 
Amazing Animated GIFs Capture Nebulae in 3D Using Artificial Parallax
https://petapixel.com/2013/02/20/amazing-animated-gifs-capture-nebulae-in-3d-using-artificial-parallax/

This animation was selected to a Moving the Still exhibition in Miami Art Week 2012


How the 3D-model is made
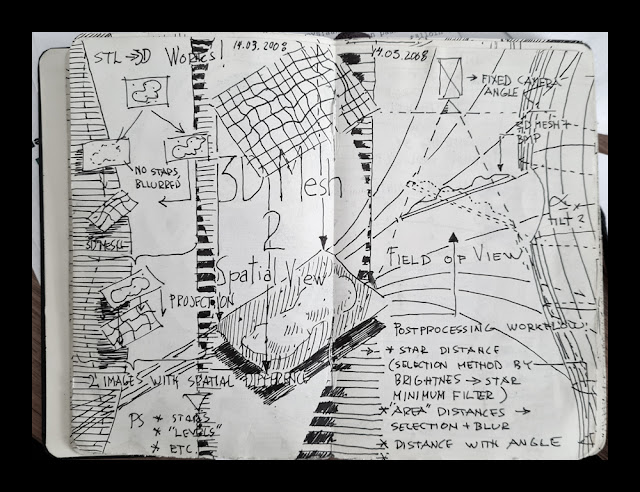
My Moleskine notebook pages from 2008, I planned how to convert nebulae to 3D


For as long as I have captured images of celestial objects, I have always seen hem three-dimensionally in my head. The scientific information makes my inner visions much more accurate, and the 3-D technique I have developed enables me to share those beautiful visions with others.

How accurate my 3-D-visions are depending on how much information I have and how well I implement it.

The final 3-D-image is always an appraised simulation of reality based on known scientific facts, deduction, and some artistic creativity.

After I have collected all the necessary scientific information about my target, I start my 3-D conversion from stars. Usually there is a recognizable star cluster which is responsible for ionizing the nebula. We don’t need to know its absolute location since we know its relative location. Stars ionizing the nebula have to be very close to the nebula structure itself. I usually divide up the rest of the stars by their apparent brightness, which can then be used as an indicator of their distances, brighter being closer. If true star distances are available, I use them, but most of the time my rule of thumb is sufficient. By using a scientific estimate of the distance of the Milky Way object, I can locate the correct number of stars in front of it and behind it.

Emission nebulae are not lit up directly by starlight; they are usually way too large for that. Rather, stellar radiation ionizes elements within the gas cloud and the nebula itself is glowing light, the principle is very much the same as in fluorescent tubes. The thickness of the nebula can be estimated from its brightness, since the whole volume of gas is glowing, brighter means thicker.

By this means, forms of the nebula can be turned to a real 3-D shape. Nebulae are also more or less transparent, so we can see both sides of it at the same time, and this makes model-making a little easier since not much is hidden.

The local stellar wind, from the star cluster inside the nebula, shapes the nebula by blowing away the gas around the star cluster. The stellar wind usually forms a kind of cavity in the nebulosity. The same stellar wind also initiates the further collapse of the gas cloud and the birth of the second generation of stars in the nebula. The collapsing gas can resist the stellar wind and produces pillar like formations which must point to a cluster.

Ionized oxygen (O-III) glows with a bluish light, and since oxygen needs a lot of energy to ionize it, this can only be achieved relatively close to the star cluster in the nebula. I use this information to position the O-III area (the bluish glow) at the correct distance relative to the heart of the nebula.

Many other small indicators can be found by carefully studying the image itself. For example, if there is a dark nebula in the image, it must be located in front of the emission one, otherwise we couldn’t see it at all.

Using the known data in this way I build a kind of skeleton model of the nebula. Then the artistic part is mixed with the scientific and logical elements, and after that the rest is very much like creating a sculpture on a cosmic scale

3D-model without textures


Friday, August 27, 2021

Visions of Veil

 This is an experimental test with a 3D-conversion of my astronomical image. Only real elements from the original image are used, there is nothing added but the estimated volumetric information!

NOTE. This is a personal vision about shapes and volumes, based on some scientific data, deduction and an artistic impression.


NFT of this video is for sale @SuperRare


Visions of Veil


 Original 2D Image, NASA APOD 2015
Click for a large image


How is the volume added to my photos?

Importantly, for as long as I have captured images of celestial objects, I have always seen them in three dimensions in the theatre of my mind. I did develop a unique process to create scientifically accurate 3D volumetric images of 'my' nebulas. The final 3D volumetric image is always an appraised simulation of reality based on known scientific data, deduction, and some artistic creativity.

After I have collected all the necessary scientific information about my target, I start my 3-D conversion using the stars in the image. Usually there is a recognizable star cluster which is responsible for ionizing the nebula. We don’t need to know its absolute location since we know its relative location. Stars ionizing the nebula have to be very close to the nebula structure itself. I usually divide up the rest of the stars by their apparent brightness, which can then be used as an indicator of their distances, brighter being closer. If true star distances are available, I use them, but most of the time my rule of thumb is sufficient. By using a scientific estimate of the distance of the Milky Way object, I can then locate the correct number of stars in front of it and behind it.

Emission nebulae are not lit up directly by starlight; they are usually way too large for that. Rather, stellar radiation ionizes elements within the gas cloud. So, it’s the nebula itself that is glowing. (The principle is very much the same as in fluorescent tubes.) The thickness of the nebula can be estimated from its brightness, since the whole volume of gas is glowing, brighter means thicker. Nebulae are also more or less transparent, so we can see both sides of it at the same time, and this makes model-making a little easier since not much is hidden.

The local stellar wind, from the star cluster inside the nebula, shapes the nebula by blowing away the gas around the star cluster. The stellar wind usually forms a kind of cavity in the nebulosity. The collapsing gas can resist the stellar wind and produces pillar like formations which must point to a cluster.

Oxygen needs a lot energy to ionize it, this can only be achieved relatively close to the star cluster in the nebula. I use this information to position the O-III area (the bluish glow) at the correct distance relative to the heart of the nebula.

Many other small indicators can be found by carefully studying the image itself. For example, if there is a dark nebula in the image, it must be located in front of the emission nebula, otherwise we can’t see it.

Explosions in space are more or less symmetrical, due to that, most of the supernova remnants and planetary nebulae mainly has a ball like appearance.

Using the known data in this way I build a kind of skeleton model of the nebula. Then the artistic part is mixed with the scientific and logical elements, and after that the rest is very much like creating a sculpture on a cosmic scale.


Wednesday, March 16, 2016

4D video of the Veil Nebula SNR


The weather up here 65N has been cloudy for months. I played with my older images and made couple of  experimental 3D animations out of them. Here is the first one, the Veil Nebula SNR in Cygnus. This is actually a 4D animation since it shows the time too... I made this just for fun, this is not an accurate model of reality but close enough for me.


4D video of the Veil Nebula supernova remnant 


Click to start and stop the movie

Watch in Youtube, HD 1080p: https://www.youtube.com/watch?v=kWt9BqAtyKI

Original 2D image of the Veil Nebula can be seen here:
http://astroanarchy.blogspot.fi/2013/12/veil-nebula-unveiled.html


Monday, August 3, 2015

A large collection of my experimental 3D-astronomy as a movie


This is an experimental test with a 3D-conversion of my astronomical image. Only real elements from the original images are used, there is nothing added but the estimated volumetric information!

NOTE. This is a personal vision about shapes and volumes, based on some scientific data, deduction and an artistic impression.

A deep deep space
A HD video, ~11 min.


 Original movie is in HD 1080p resolution. 
Please, click the Youtube logo at lower right to see this video in Youtube. 
In youtube,  click the Gear symbol, at lower right in Youtube window, and select the Quality to 1080p.
Then watch the video in full screen for the best viewing experience.
Info about the technique used

Due to huge distances, real parallax can't be imaged in most of the astronomical objects.
I have developed an experimental technique to convert my astropics to a artificial volumetric models.

My 3-D experiments are a mixture of science and an artistic impression. I collect distance and other information before I do my 3-D conversion. Usually there are known stars, coursing the ionization, so I can place them at right relative distance. If I know a distance to the nebula, I can fine tune distances of the stars so, that right amount of stars are front and behind of the object.

I use a “rule of thumb” method for stars: brighter is closer, but if a real distance is known, I'm using that. Many 3-D shapes can be figured out just by looking carefully the structures in nebula, such as dark nebulae must be at front of the emission nebulae in order to show up etc...

The general structure of many star forming regions is very same, there is a group of young stars, as an open cluster inside of the nebula. The stellar wind from the stars is then blowing the gas away around the cluster and forming a kind of cavitation – or a hole — around it. The pillar-like formations in the nebula must point to a source of stellar wind, for the same reason.

How accurate the final model is, depends how much I have known and guessed right. The motivation to make those 3-D-studies is just to show, that objects in the images are not like paintings on the canvas but really three dimensional objects floating in the three dimensional space. This generally adds a new dimension to my hobby as an astronomical imager.


Friday, July 31, 2015

An experimental 3D-study of an emission nebula Melotte 15


This is an experimental test with a 3D-conversion of my astronomical image. Only real elements from the original image are used, there is nothing added but the estimated volumetric information!

NOTE. This is a personal vision about shapes and volumes, based on some scientific data, deduction and an artistic impression.

My original photo of the Melotte 15 in IC 1805
click for a large image

A blog post about this photo, with the technical details, can be seen HERE


An animated GIF


Video 1


This is a looped video, click to start and stop. Original movie is in HD720p resolution.


Video 2


This is a looped video, click to start and stop. Original movie is in HD720p resolution.


Info about the technique used

Due to huge distances, real parallax can't be imaged in most of the astronomical objects.
I have developed an experimental technique to convert my astropics to a artificial volumetric models.

My 3-D experiments are a mixture of science and an artistic impression. I collect distance and other information before I do my 3-D conversion. Usually there are known stars, coursing the ionization, so I can place them at right relative distance. If I know a distance to the nebula, I can fine tune distances of the stars so, that right amount of stars are front and behind of the object.

I use a “rule of thumb” method for stars: brighter is closer, but if a real distance is known, I'm using that. Many 3-D shapes can be figured out just by looking carefully the structures in nebula, such as dark nebulae must be at front of the emission nebulae in order to show up etc...

The general structure of many star forming regions is very same, there is a group of young stars, as an open cluster inside of the nebula. The stellar wind from the stars is then blowing the gas away around the cluster and forming a kind of cavitation – or a hole — around it. The pillar-like formations in the nebula must point to a source of stellar wind, for the same reason.

How accurate the final model is, depends how much I have known and guessed right. The motivation to make those 3-D-studies is just to show, that objects in the images are not like paintings on the canvas but really three dimensional objects floating in the three dimensional space. This generally adds a new dimension to my hobby as an astronomical imager.


Tuesday, July 28, 2015

An experimental 3D-study of an emission nebula IC 410


This is an experimental test with a 3D-conversion of my astronomical image. Only real elements from the original image are used, there is nothing added but the estimated volumetric information!

NOTE. This is a personal vision about shapes and volumes, based on some scientific data, deduction and an artistic impression.

My original photo of the IC 410
click for a large image

A blog post about this photo, with the technical details, can be seen HERE


An animated GIF


A flythrough video


This is a looped video, click to start and stop. Original movie is in HD720p resolution.
¨

A flyby video


This is a looped video, click to start and stop. Original movie is in HD720p resolution.


A study about the general structure of the IC 410

All pillar like formations are pointing to a source of ionization, the open cluster NGC 1893 at the heart of the IC 410. There are some more dense areas in a gas, able to resist the radiation pressure from young star cluster. Those dense areas, at tip of the pillars, are also potential places for the formations of the new stars. A radiation pressure (solar wind) from the cluster NGC 1893 is forming a hollow space inside a gas cloud, it  can be seen in my 3D-studies too.


Stereo images of the IC 410
Parallel and Cross vision stereo pairs. An anaglyph Red/Cyan image (Red/Cyan eyeglasses are needed)
http://astroanarchy.blogspot.fi/2015/02/a-3d-study-of-ic-410-as-free-view.html

A Cross vision stereo pair as a sample, other formats behind the link above.


Info about the technique used

For as long as I have captured images of celestial objects, I have always seen
them three-dimensionally in my head. Over time I realized that we actually have
enough scientific information to build a coarse skeleton model of the nebula itself.

The scientific information makes my visions much more accurate, and the 3-D technique I have developed enables me to share those beautiful visions with others.
How accurate my 3-D-visions are depends on how much accurate information I have and how well I implement it.

Also, many different estimates are needed for the 3-D model. The final 3-D-image is always an appraised simulation of reality based on known scientific facts, deduction, and some artistic creativity
on top of everything else.

After I have collected all the necessary scientific information about my target,
I start my 3-D conversion using the stars in the image. Usually there is a recognizable star cluster which is responsible for ionizing the nebula. We don’t need to
know its absolute location since we know its relative location. Stars ionizing the
nebula have to be very close to the nebula structure itself. I usually divide up the
rest of the stars by their apparent brightness, which can then be used as an indicator of their distances, brighter being closer. If true star distances are available
I use them, but most of the time my rule of thumb is sufficient.
By using a scientific estimate of the distance of the Milky Way object, I can
then locate the correct number of stars in front of it and behind it.

Emission nebulae are not lit up directly by starlight; they are usually way too
large for that. Rather, stellar radiation ionizes elements within the gas cloud. So it
is the nebula itself that is glowing, at the characteristic wavelengths of each ionized element. (The principle is very much the same as in fluorescent tubes.) I use
this information for my 3-D model. The thickness of the nebula can be estimated
from its brightness, since the whole volume of gas is glowing, brighter means
thicker. By this means, forms of the nebula can be turned to a real 3-D shape.
Nebulae are also more or less transparent, so we can see both sides of it at the
same time, and this makes model-making a little easier since not much is hidden.

The local stellar wind, from the star cluster inside the nebula, shapes the
nebula by blowing away the gas around the star cluster. The stellar wind usually
forms a kind of cavity in the nebulosity. The same stellar wind also initiates the
further collapse of the gas cloud and the birth of the second generation of stars
in the nebula. The collapsing gas can resist the stellar wind and produces pillar like formations which must point to a cluster.

Ionized oxygen (O-III) glows with a bluish light, and since oxygen needs a lot
of energy to ionize it, this can only be achieved relatively close to the star cluster
in the nebula. I use this information to position the O-III area (the bluish glow) at
the correct distance relative to the heart of the nebula.

Many other small indicators can be found by carefully studying the image
itself. For example, if there is a dark nebula in the image, it must be located in
front of the emission nebula, otherwise we can’t see it.

Explosions in space are more or less symmetrical, due to that, most of the supernova remnants and planetary nebulae mainly has a ball like appearance .   

Using the known data in this way I build a kind of skeleton model of the
nebula. Then the artistic part is mixed with the scientific and logical elements,
and after that the rest is very much like creating a sculpture on a cosmic scale


Wednesday, July 22, 2015

Pickering's Triangle in O-III light, an experimental 3D-study


This is an experimental test with a 3D-conversion of my astronomical image. Only real elements from the original image are used, there is nothing added but the estimated volumetric information!

NOTE. This is a personal vision about shapes and volumes, based on some scientific data, deduction and an artistic impression.

My original photo of the Pickering's Triangle
click for a large image

Pickering's Triangle, in the Veil Nebula, at light of an ionized oxygen alone.
A blog post about this photo, with the technical details, can be seen HERE


The 3D-study as a video


This is a looped video, click to start and stop. Original movie is in HD720p resolution.


An older 3D-study of  the Veil Nebula supernova remnant

Veil Nebula supernova remnant as a 3D-model
In constellation Cygnus, animation in natural colors


This is a looped video, click to start and stop. Original movie is in HD1080p resolution.


Info about the technique used

Due to huge distances, real parallax can't be imaged in most of the astronomical objects.
I have developed an experimental technique to convert my astropics to a artificial volumetric models.

My 3-D experiments are a mixture of science and an artistic impression. I collect distance and other information before I do my 3-D conversion. Usually there are known stars, coursing the ionization, so I can place them at right relative distance. If I know a distance to the nebula, I can fine tune distances of the stars so, that right amount of stars are front and behind of the object.

I use a “rule of thumb” method for stars: brighter is closer, but if a real distance is known, I'm using that. Many 3-D shapes can be figured out just by looking carefully the structures in nebula, such as dark nebulae must be at front of the emission nebulae in order to show up etc...

The general structure of many star forming regions is very same, there is a group of young stars, as an open cluster inside of the nebula. The stellar wind from the stars is then blowing the gas away around the cluster and forming a kind of cavitation – or a hole — around it. The pillar-like formations in the nebula must point to a source of stellar wind, for the same reason.

How accurate the final model is, depends how much I have known and guessed right. The motivation to make those 3-D-studies is just to show, that objects in the images are not like paintings on the canvas but really three dimensional objects floating in the three dimensional space. This generally adds a new dimension to my hobby as an astronomical imager.


Saturday, July 18, 2015

An experimental 3D-study of an emission nebula Cederblad 214


This is an experimental test with a 3D-conversion of my astronomical image. Only real elements from the original image are used, there is nothing added but the estimated volumetric information!

NOTE. This is a personal vision about shapes and volumes, based on some scientific data, deduction and an artistic impression.

My original photo of the Cederblad 214
click for a large image

Pillar like formations of Cederblad 214.
A blog post about this photo, with the technical details, can be seen HERE


An animated GIF

Please, let the animation load for a few moments to see smooth movement. ~8,5MB


A flythrough video


This is a looped video, click to start and stop. Original movie is in HD720p resolution.


A study about shapes in the nebula

All pillar like formations are pointing to a source of ionization, the open cluster NGC 7822. There are some more dense areas in a gas, able to resist the radiation pressure from young star cluster. Those dense areas, at tip of the pillars, are also potential places for the formations of the new stars. A radiation pressure (solar wind) from the cluster 7822 is forming a hollow space inside a gas cloud, it can be seen in my 3D-studies too.

Info about the technique used

Due to huge distances, real parallax can't be imaged in most of the astronomical objects.
I have developed an experimental technique to convert my astropics to a artificial volumetric models.

My 3-D experiments are a mixture of science and an artistic impression. I collect distance and other information before I do my 3-D conversion. Usually there are known stars, coursing the ionization, so I can place them at right relative distance. If I know a distance to the nebula, I can fine tune distances of the stars so, that right amount of stars are front and behind of the object.

I use a “rule of thumb” method for stars: brighter is closer, but if a real distance is known, I'm using that. Many 3-D shapes can be figured out just by looking carefully the structures in nebula, such as dark nebulae must be at front of the emission nebulae in order to show up etc...

The general structure of many star forming regions is very same, there is a group of young stars, as an open cluster inside of the nebula. The stellar wind from the stars is then blowing the gas away around the cluster and forming a kind of cavitation – or a hole — around it. The pillar-like formations in the nebula must point to a source of stellar wind, for the same reason.

How accurate the final model is, depends how much I have known and guessed right. The motivation to make those 3-D-studies is just to show, that objects in the images are not like paintings on the canvas but really three dimensional objects floating in the three dimensional space. This generally adds a new dimension to my hobby as an astronomical imager.


Tuesday, July 14, 2015

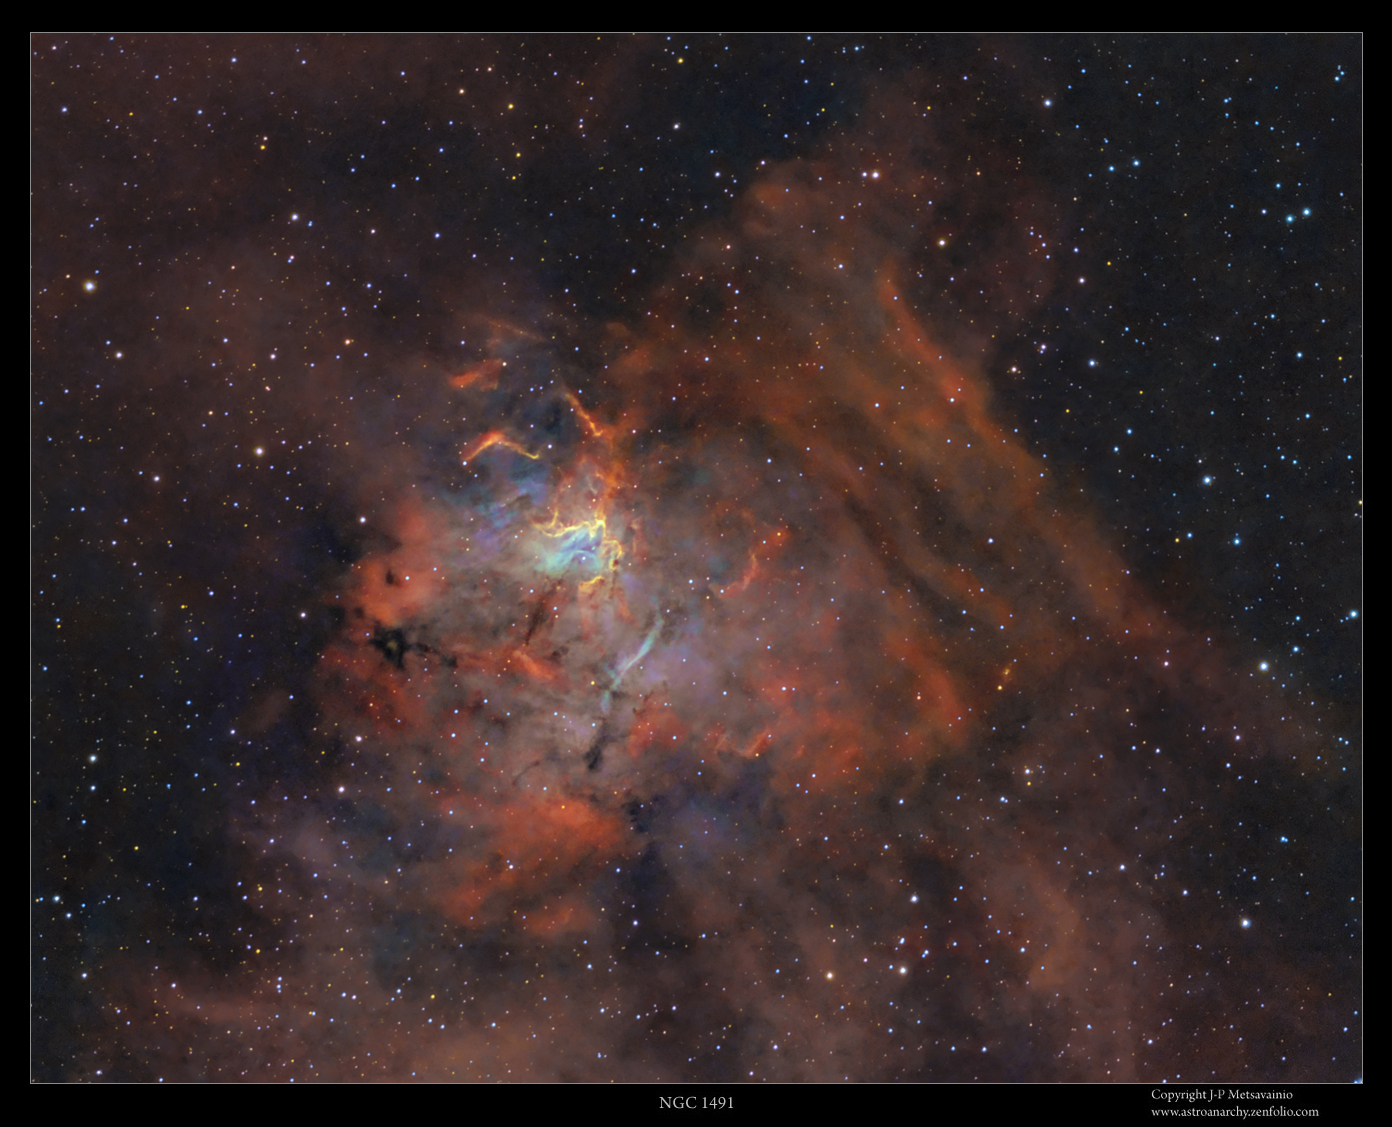
An experimental 3D-study of an emission nebula NGC 1491


This is an experimental test with a 3D-conversion of my astronomical image. Only real elements from the original image are used, there is nothing added but the estimated volumetric information!

NOTE. This is a personal vision about shapes and volumes, based on some scientific data, deduction and an artistic impression.

My original photo of the NGC 1491
click for a large image

A blog post about this photo, with technical details, can be seen HERE


An animated GIF
Please, let the animation load to see it smoothly (~7,5MB)


Info about the technique used

Due to huge distances, real parallax can't be imaged in most of the astronomical objects.
I have developed an experimental technique to convert my astropics to a artificial volumetric models.

My 3-D experiments are a mixture of science and an artistic impression. I collect distance and other information before I do my 3-D conversion. Usually there are known stars, coursing the ionization, so I can place them at right relative distance. If I know a distance to the nebula, I can fine tune distances of the stars so, that right amount of stars are front and behind of the object.

I use a “rule of thumb” method for stars: brighter is closer, but if a real distance is known, I'm using that. Many 3-D shapes can be figured out just by looking carefully the structures in nebula, such as dark nebulae must be at front of the emission nebulae in order to show up etc...

The general structure of many star forming regions is very same, there is a group of young stars, as an open cluster inside of the nebula. The stellar wind from the stars is then blowing the gas away around the cluster and forming a kind of cavitation – or a hole — around it. The pillar-like formations in the nebula must point to a source of stellar wind, for the same reason.

How accurate the final model is, depends how much I have known and guessed right. The motivation to make those 3-D-studies is just to show, that objects in the images are not like paintings on the canvas but really three dimensional objects floating in the three dimensional space. This generally adds a new dimension to my hobby as an astronomical imager.


Sunday, July 12, 2015

An experimental 3D-study, Sharpless 115 Nebula in Cygnus


This is an experimental test with a 3D-conversion of my astronomical image. Only real elements from the original image are used, there is nothing added but the estimated volumetric information!

NOTE. This is a personal vision about shapes and volumes, based on some scientific data, deduction and an artistic impression.

My original photo of the Sharpless 115 (Sh2-115)
click for a large image

A blog post about this photo, with technical details, can be seen HERE


An animated GIF


VIDEO 1


This is a looped video, click to start and stop. Original movie is in HD720p resolution.


Info about the technique used

Due to huge distances, real parallax can't be imaged in most of the astronomical objects.
I have developed an experimental technique to convert my astropics to a artificial volumetric models.

My 3-D experiments are a mixture of science and an artistic impression. I collect distance and other information before I do my 3-D conversion. Usually there are known stars, coursing the ionization, so I can place them at right relative distance. If I know a distance to the nebula, I can fine tune distances of the stars so, that right amount of stars are front and behind of the object.

I use a “rule of thumb” method for stars: brighter is closer, but if a real distance is known, I'm using that. Many 3-D shapes can be figured out just by looking carefully the structures in nebula, such as dark nebulae must be at front of the emission nebulae in order to show up etc...

The general structure of many star forming regions is very same, there is a group of young stars, as an open cluster inside of the nebula. The stellar wind from the stars is then blowing the gas away around the cluster and forming a kind of cavitation – or a hole — around it. The pillar-like formations in the nebula must point to a source of stellar wind, for the same reason.

How accurate the final model is, depends how much I have known and guessed right. The motivation to make those 3-D-studies is just to show, that objects in the images are not like paintings on the canvas but really three dimensional objects floating in the three dimensional space. This generally adds a new dimension to my hobby as an astronomical imager.


Saturday, July 11, 2015

An experimental 3D-study of the Pelican Nebula in Cygnus


This is an experimental test with a 3D-conversion of my astronomical image. Only real elements from the original image are used, there is nothing added but the estimated volumetric information!

NOTE. This is a personal vision about shapes and volumes, based on some scientific data, deduction and an artistic impression.

My original photo of the Pelican Nebula
click for a large image
A blog post about this photo, with technical details, can be seen HERE


An animated GIF


VIDEO 1


This is a looped video, click to start and stop. Original movie is in HD720p resolution.


VIDEO 2


This is a looped video, click to start and stop. Original movie is in HD720p resolution.

Info about the technique used

Due to huge distances, real parallax can't be imaged in most of the astronomical objects.
I have developed an experimental technique to convert my astropics to a artificial volumetric models.

My 3-D experiments are a mixture of science and an artistic impression. I collect distance and other information before I do my 3-D conversion. Usually there are known stars, coursing the ionization, so I can place them at right relative distance. If I know a distance to the nebula, I can fine tune distances of the stars so, that right amount of stars are front and behind of the object.

I use a “rule of thumb” method for stars: brighter is closer, but if a real distance is known, I'm using that. Many 3-D shapes can be figured out just by looking carefully the structures in nebula, such as dark nebulae must be at front of the emission nebulae in order to show up etc...

The general structure of many star forming regions is very same, there is a group of young stars, as an open cluster inside of the nebula. The stellar wind from the stars is then blowing the gas away around the cluster and forming a kind of cavitation – or a hole — around it. The pillar-like formations in the nebula must point to a source of stellar wind, for the same reason.

How accurate the final model is, depends how much I have known and guessed right. The motivation to make those 3-D-studies is just to show, that objects in the images are not like paintings on the canvas but really three dimensional objects floating in the three dimensional space. This generally adds a new dimension to my hobby as an astronomical imager.


Thursday, July 9, 2015

An experimental 3D-study of the IC 1795


This is an experimental test with a 3D-conversion of my astronomical image. Only real elements from the original image are used, there is nothing added but the estimated volumetric information!

NOTE. This is a personal vision about shapes and volumes, based on some scientific data, deduction and an artistic impression.


My original photo of the IC 1795 in the Heart Nebula

A blog post about this photo, with technical details, can be seen HERE


3D-study as a Video


This is a looped video, click to start and stop. Original movie is in HD720p resolution.


A simple animated GIF


Info about the technique used

Due to huge distances, real parallax can't be imaged in most of the astronomical objects.
I have developed an experimental technique to convert my astropics to a artificial volumetric models.

My 3-D experiments are a mixture of science and an artistic impression. I collect distance and other information before I do my 3-D conversion. Usually there are known stars, coursing the ionization, so I can place them at right relative distance. If I know a distance to the nebula, I can fine tune distances of the stars so, that right amount of stars are front and behind of the object.

I use a “rule of thumb” method for stars: brighter is closer, but if a real distance is known, I'm using that. Many 3-D shapes can be figured out just by looking carefully the structures in nebula, such as dark nebulae must be at front of the emission nebulae in order to show up etc...

The general structure of many star forming regions is very same, there is a group of young stars, as an open cluster inside of the nebula. The stellar wind from the stars is then blowing the gas away around the cluster and forming a kind of cavitation – or a hole — around it. The pillar-like formations in the nebula must point to a source of stellar wind, for the same reason.

How accurate the final model is, depends how much I have known and guessed right. The motivation to make those 3-D-studies is just to show, that objects in the images are not like paintings on the canvas but really three dimensional objects floating in the three dimensional space. This generally adds a new dimension to my hobby as an astronomical imager. 


Thursday, June 25, 2015

An experimental 3D-study of the NGC 2174, the Monkey Head Nebula


This is an experimental test with a 3D-conversion of my astronomical image. Only real elements from the original image are used, there is nothing added but the volumetric information!

NOTE. This is a personal vision about shapes and volumes, based on some scientific data  and an artistic impression.


The original 2D-image of NGC 2175
A blog post about this photo, with technical details, can be seen HERE


Video1 of NGC 2175


This is a looped video, click to start and stop. Original movie is in HD720p resolution.


Video2 of NGC 2175


This is a looped video, click to start and stop. Original movie is in HD720p resolution.


An animated GIF


Info about the technique used

Due to huge distances, real parallax can't be imaged in most of the astronomical objects.
I have developed an experimental technique to convert my astropics to a artificial volumetric models.

My 3-D experiments are a mixture of science and an artistic impression. I collect distance and other information before I do my 3-D conversion. Usually there are known stars, coursing the ionization, so I can place them at right relative distance. If I know a distance to the nebula, I can fine tune distances of the stars so, that right amount of stars are front and behind of the object.

I use a “rule of thumb” method for stars: brighter is closer, but if a real distance is known, I'm using that. Many 3-D shapes can be figured out just by looking carefully the structures in nebula, such as dark nebulae must be at front of the emission nebulae in order to show up etc...

The general structure of many star forming regions is very same, there is a group of young stars, as an open cluster inside of the nebula. The stellar wind from the stars is then blowing the gas away around the cluster and forming a kind of cavitation – or a hole — around it. The pillar-like formations in the nebula must point to a source of stellar wind, for the same reason.

How accurate the final model is, depends how much I have known and guessed right. The motivation to make those 3-D-studies is just to show, that objects in the images are not like paintings on the canvas but really three dimensional objects floating in the three dimensional space. This generally adds a new dimension to my hobby as an astronomical imager. 

A screenshot of the 3D-model

A 3D-mesh was used as a body for the animated image, there are no textures yet applied in the model.


Wednesday, May 28, 2014

Cone Nebula as an animated zoom in series


I have shot many targets with a several focal lengths and instruments.
Due to that, I'm able to publish some of my photos as an image set, with a different field of view and detail levels. The fractal nature of our universe stands out nicely by this way and it will make the orientation more easy.

Zooming into the Cone Nebula
An animated GIF, 3,4MB


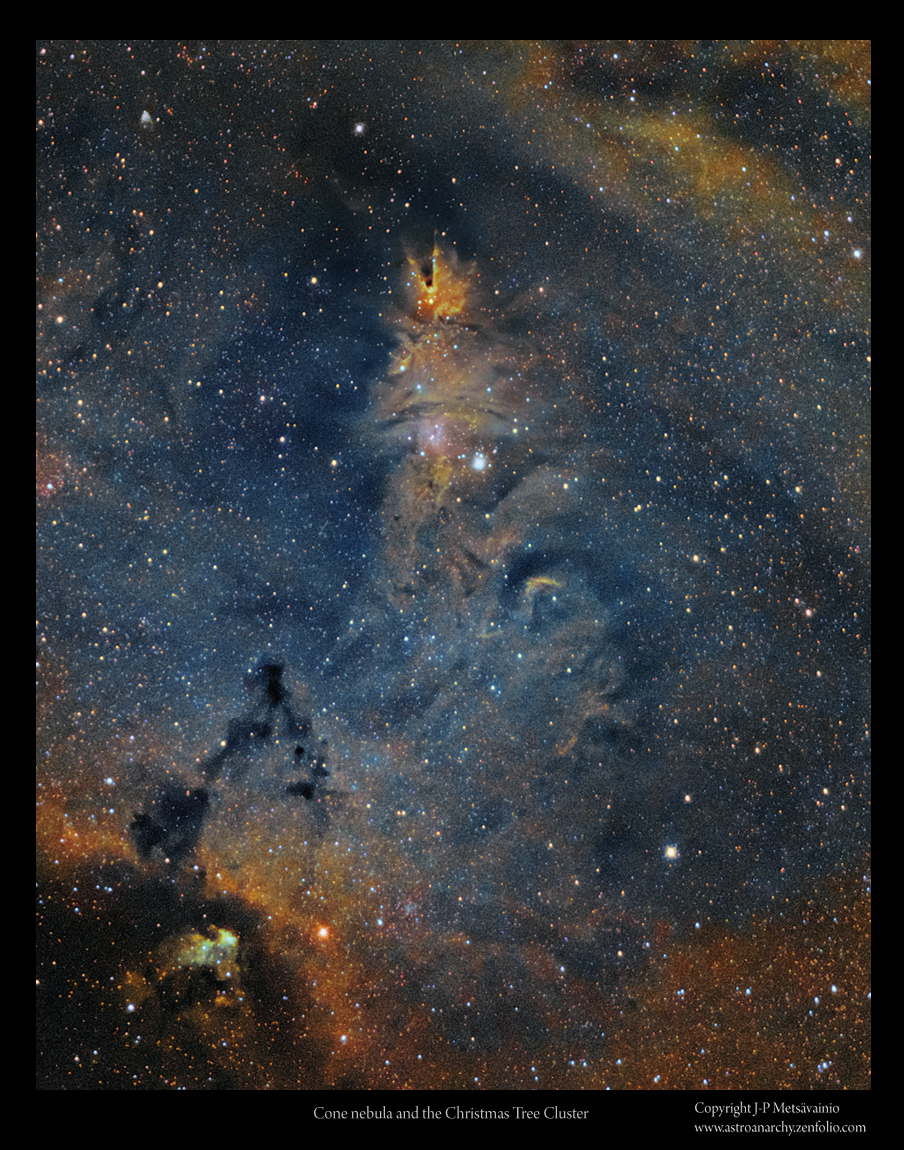
The Cone Nebula and the Christmas Tree Cluster

More info about this image HERE
Buy a photographic print from HERE

A study about the apparent scale in the sky
Note. an apparent size of the Moon is marked as a circle.
Moon has an angular diameter of ~0,5 degrees, that's ~30 arc minutes.

Click for a large image